Below are the full instructions to pull in TR Online Booking events. Online booking is used for booking appointments for family members (i.e. daughter booking events for her father) or for the client themselves. Click on a link to see more information.
1. Setup Online Booking account
1. Navigate to Online Booking Access
a. Click Admin
b. Click Online Booking Access
2. Click the plus button
3. Enter the following information:
a. Email
b. Name
c. Password
d. Profile you want to create events for
4. Click the save button
2. Optional - Update email message for Online Booking
3. Enable TR access
1. Navigate to Profile Editor
a. Click Edit
b. Click Profile Editor
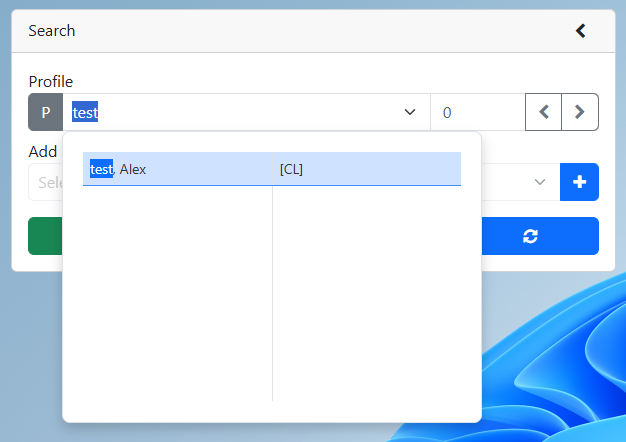
2. Search for an existing profile
a. Enter the profile number or the profile name into the profile search
i. Click the clients name from the drop down if you are entering the profile name
ii. If entering the profile number click somewhere else on the screen
b. Profile is displayed
3. Open the TR or FRZ module
4. Find the OB Access field
a. FRZ module
b. TR module
5. Set the OB Access Field to "Yes"
4. Send email to client
1. Navigate to Online Booking Access
a. Click Admin
b. Click Online Booking Access
2. Click the envelope button beside the person you would like to invite
3. An invitation email will be sent (Example below).
5. Client creates event
a. Note: Instructions for creating events are on your Online Booking site.
6. Pull in event using the Action Grid
1. Navigate to the Home Page
a. Click the NesdaTrak logo
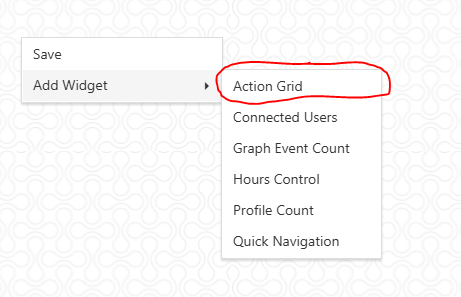
2. Add the Action Grid widget if not already added
a. Right click on the screen
b. Hover over “Add Widget”
c. Click the widget you would like to add (ex. Action Grid)
d. If needed, pull the bottom right corner of the widget to expand it.
3. Click the blue calendar beside the event you would like to accept.
4. If you plan to save the event
a. View the event details and confirm they are correct. Make any needed changes.
5. Save, Cancel, or Delete the event.
a. Changes you make will reflect on the client side.
7. Optional - Verify event Event Editor
1. Navigate to Event Editor
a. Click Edit
b. Click Event Editor
2. Set the date range to a date range that will include the event
3. Optional - Set the Profile Name or the Profile Number to narrow down the search
4. Optional - Set the Module to narrow down the search
5. Optional - Change the options to include Posted or Canceled events
6. Click the Search button
7. Verify that the Online Booking Event is present.
 Setup Online Booking account