1. Create a Here 2 Volunteer organization
a. Enter https://here2volunteer.com/ into the address bar in your web browser
b. Click the Login button
c. Click the Organization Signup button
d. Fill in the required information for your personal account
e. Click the next button
f. Fill in the required information for your organization
g. Click the Signup button
2. Connect the Here 2 Volunteer organization to NesdaTrak
a. Login to Here 2 Volunteer using the Organization Login
Note: Access to the organization itself is limited (ex. Supervisors). If you can not login using the organization login page, please login using the volunteer login page.
a. Enter https://here2volunteer.com/ into the address bar in your web browser
b. Click the Login button
c. Optional - Click the Organization Login button
d. Enter your email and password
e. Click the Sign in button
b. Click the Settings menu option
c. Update the API pre shared key
d. Click the save button
e. Email Nesda Technologies and let them know what the API pre shared key is
3. Set the H2 options in NesdaTrak
a. Navigate to the Options screen
a. Click Admin
b. Click Options
b. Navigate to Controls Options
a. Click on the Controls option on the sidebar or scroll down the web page until you see the Controls section.
c. In the control settings table locate the date for the module you would like to send to Here 2 Volunteer
d. Change the value of the setting to cc_datet
e. In the Control Required/Fill Setting table find the H2 settings for the module you would like to send to Here 2 Volunteer
i. Form: E
ii. Module: module you would like to send to Here 2 Volunteer (Ex. HMK)
iii. Prompt: H2
f. Select the blank option from the display drop down
g. In the Control Required/Fill Setting table find the H2 settings for the PW or PE module
i. Form: P
ii. Module: PE or PW
iii. Prompt: H2 Invite, H2 Status, and Here2
h. For H2 invite and Here2 - Select the blank option from the display drop down
i. For H2 Status - Select the E option for the display drop down
j. Click the save button
4. Connect server profile/s to Here 2 Volunteer
a. Navigate to Profile Editor
a. Click Edit
b. Click Profile Editor
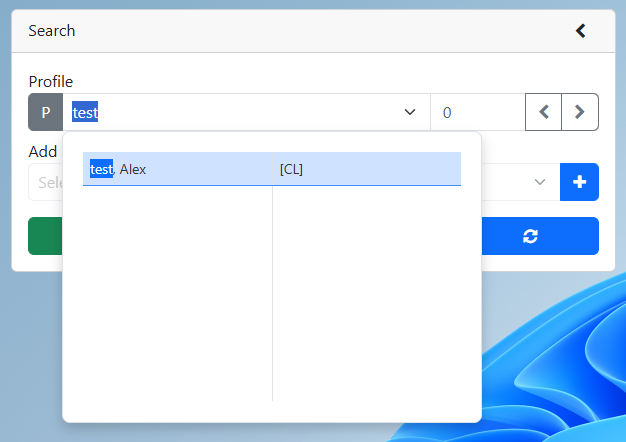
b. Search for a server profile
a. Enter the profile number or the profile name into the profile search
i. Click the clients name from the drop down if you are entering the profile name
ii. If entering the profile number click the refresh button
b. Profile is displayed
c. Select the PW or PE module
d. Verify that the email address field is filled in
e. Set the Here2 field to H2V
f. Set the H2 invite field to Send
g. Refresh the profile. The H2 Status will be either Queued or Active.
i. Queued - the invitation email is being sent to the server.
ii. Active - the H2V account is attached to the server's profile
5. Create a new event with H2 settings
a. Navigate to Event Editor
a. Click Edit
b. Click Event Editor
b. Optional - Search for the profile you would like to make events for.
c. Select the module for the event you would like to create
d. Click the New Event Button
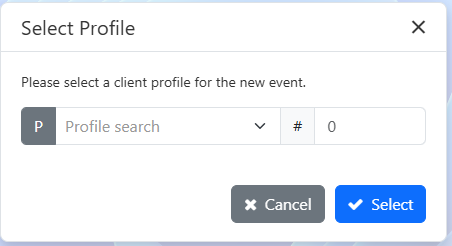
e. If you did not select a profile in step 2 you will now be prompted to
f. Event details are auto populated based on the profile
VS
Profile Editor
g. Fill in any required information (Ex. Event name)
h. Set the date and time of the event
i. Set the Event Hours
j. Set the server for the event
i. If you know who the server is:
1. Type the server name into the server field
ii. If you do not know who the server is or you do not know if their H2V account is linked:
1. Click the M button beside the server field
2. Optional - If no servers are displayed click the Show All check box
3. Double click on a server whose account is linked to H2V
k. Set the H2 drop down to Yes
l. Click the save button
6. Send an existing event to Here 2 Volunteer
a. Navigate to Event Editor
a. Click Edit
b. Click Event Editor
b. Search for events
a. Optional - Set the Profile Name or the Profile Number to narrow down the search
b. Optional - Set the date range to a date range that will include the event
c. Optional - Set the Module to narrow down the search
d. Optional - Change the options to include Posted or Canceled events
e. Click the Search button
c. Click the event you would like to send to Here 2 Volunteer
d. Verify that the date and time are correct
e. Verify that the hours are set
f. Click the M button
g. In the match screen pop-up
a. Optional - If no servers are displayed click the Show All check box
b. Select a server with a H2V account (i.e. a 2 beside their name)
c. Click the Send to H2V button
h. Click the Save button
7. Optional - Memorize the event
a. Navigate to Event Editor
a. Click Edit
b. Click Event Editor
b. Search for events
a. Optional - Set the Profile Name or the Profile Number to narrow down the search
b. Optional - Set the date range to a date range that will include the event
c. Optional - Set the Module to narrow down the search
d. Optional - Change the options to include Posted or Canceled events
e. Click the Search button
c. Click the event you would like to edit (Note this should be done before the server accepts the shift)
d. Click the Memorize button
e. In the Memorized event Editor
a. Optional - Change the "Next Create Date" date
The next create date controls when the events are next created
b. Optional - Change the "Apply Changes From" date
The Apply Changes From date controls when the changes are applied.
c. Optional - Set the "Repeat this event" settings
This controls how the event repeats (Daily, once a week, etc.)
There are 4 options for repeating an event
1. Every _ Day(s). This would create an event every 1 day, 2 day, etc.
2. On the _ day of each month. This would create an event on the 1st, 2nd, 3rd, etc. day of each month
3. _ _ of each week. This would create events in a specific weekly pattern. Ex. Every MonWedFri of each week.
4. On the _ _ of each month. This would create events in a specific monthly pattern. Ex. On the First Monday of each month
d. Set the "Create the event _ days before it is scheduled" field
This controls when the event is created.
Ex. If the "Create the event_ days before it is scheduled" field was set to 5 and the next event was scheduled to be created on September 23rd. Then the events would start to be created on September 18th.
e. Set the "Repeat this create _ times" field
This controls how many times the event is created. If you would like the event to repeat forever set this field to 9999.
f. Change any other settings
g. Set the H2 drop down to yes
8. Check the status of events
a. Navigate to Event Editor
a. Click Edit
b. Click Event Editor
b. Search for events
a. Optional - Set the Profile Name or the Profile Number to narrow down the search
b. Optional - Set the date range to a date range that will include the event
c. Optional - Set the Module to narrow down the search
d. Optional - Change the options to include Posted or Canceled events
e. Click the Search button
c. View the O and P columns to check the status of an event
i. O stands of organization
ii. P stands for profile
iii. Status Colours
1. White : No status, not connected
2. Green: On the list, accepted appointment
3. Purple: On the list but requested to cancel by the other party
4. Blue: Requested to be on the list by the other party
5. Red: Request to cancel
6. Gold: Off the list
7. Black: Draft Mode
9. Check the complete status of an event
a. Navigate to Event Editor
a. Click Edit
b. Click Event Editor
b. Search for events
a. Optional - Set the Profile Name or the Profile Number to narrow down the search
b. Optional - Set the date range to a date range that will include the event
c. Optional - Set the Module to narrow down the search
d. Optional - Change the options to include Posted or Canceled events
e. Click the Search button
c. View the complete column to check the complete status
i. If the complete field is Yes then the server has checked out and a signature was recorded
10. Check the signature of an event
a. Navigate to Event Editor
a. Click Edit
b. Click Event Editor
b. Search for events
a. Optional - Set the Profile Name or the Profile Number to narrow down the search
b. Optional - Set the date range to a date range that will include the event
c. Optional - Set the Module to narrow down the search
d. Optional - Change the options to include Posted or Canceled events
e. Click the Search button
c. Click on a completed event
d. Click the Case Note button
e. In the Add Case Notes pop up
a. Click the arrow in front of the date
b. Click the attachment to view the signature
 Create a Here 2 Volunteer organization